The first major stop on the Subway Trek is Archangel Falls, covered in my last post. Moving upstream, one comes up to a flat area where flowing water carved a deep crack in an otherwise flat surface.
The area around The Crack” is exceptionally slippery. I fell twice as did a couple of other people. I recommend having or renting a pair of shoes suitable for such conditions. I had no such shoes and paid the price. The weather was warm enough we did not rent wetsuits but such gear is nearly mandatory for hiking “The Narrows”
Someone asked me what the yellow leaves were in the Archangel Falls image. Apologies for the delay in answering. There are at three different yellow leaves. There are smooth oval leaves and I do not know what those are at all. Aspens, Poplars, and Cottonwoods are all in the same general family, and they are toothed. The aspens are generally yellow. I do not know the variety. Bigtooth maples can also be yellow but they were mainly red or orange.
The red and orange leaves, and a couple of the yellow ones in this feature image are bigtooth maples. I have more images of brilliant maples coming up later.
Perspective Control
The best way to take this image is pointing straight down. Otherwise, you will see the railroad track effect. To shoot straight down, one needs a tripod with a center arm that will collapse to a horizontal position. My tripod does that, but that setup takes more time, and people were stacking up behind us. I did not want to get to the Subway so late as to miss the best light or not get a good position.
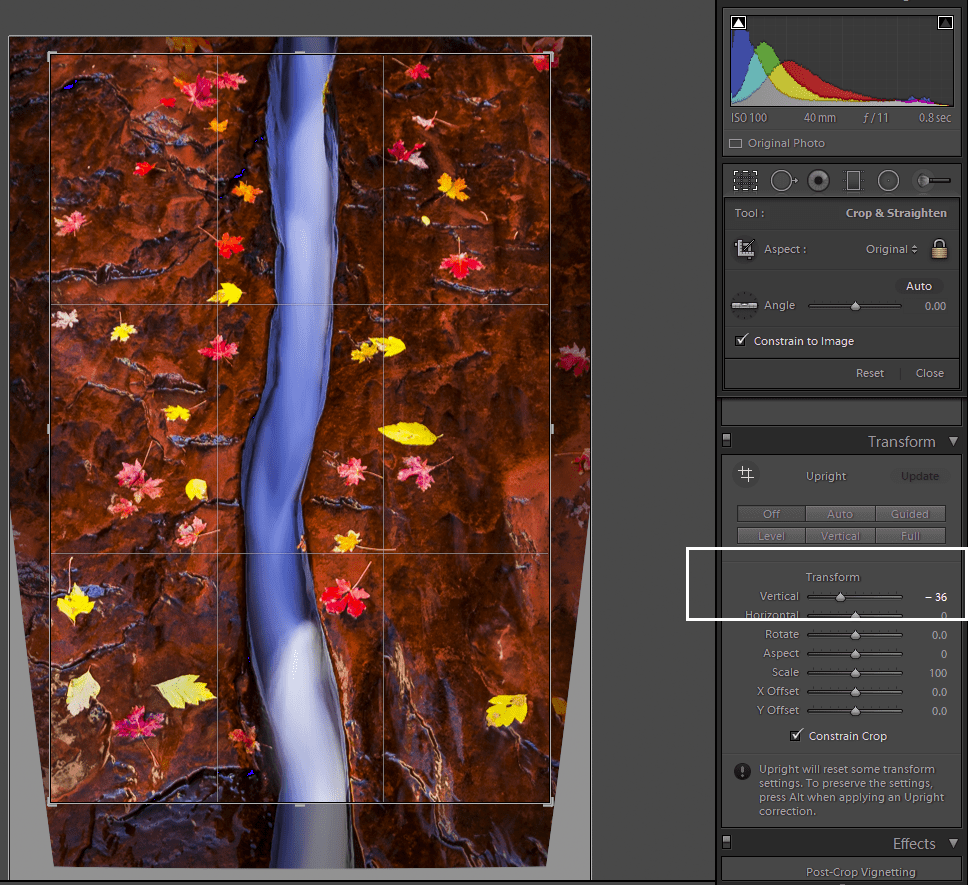
My straight-up image of the crack does have a bit of a railroad track effect, but I partially corrected that in Lightroom. Here is the image without perspective modification.
Notice the leaves get smaller away from the lower end of the photo. I could not eliminate the railroad track perspective issue completely without causing unwanted cropping distortions, but the effect is barely noticeable now. The next image shows how.
When you change perspective, you will end up clipping a portion of the image.
It is conceptually easier to simply take the shot horizontally and display it vertically but I kept getting my tripod legs into the picture. Again, using an extension arm that moves horizontally is the correct approach.
I intended to take more images of the crack after photographing the subway but the light had changed. Direct sunlight ruined the shot.
Hike Comments
The subway hike is 6.5 miles round-trip and is rated strenuous. I would rate it moderately-strenuous. The elevation change is mostly gradual except for a steep 600-foot change at the beginning (down) and end (up).
For comparison purposes, I would rate Angel’s Landing with a 1500 foot elevation change as strenuous. Yet, the Subway requires scrambling and the trail is very slippery in spots. I fell twice and one person slipped into the pool at the Subway (it’s deep). Get or rent a pair of shoes suitable for wet slippery conditions. The outfitters near the park can help.
Mark your entry/exit spot with GPS, by time, or both. There is no clear path to the end of the Subway trail. Two hikers we came across were convinced they passed the exit spot. They were going to scramble up loose rocks to the top. They were convinced their car was at the gap at the top. I talked them out of it.
It is better to be lost on the main route than lost where only a search party may find you. It turns out, they were a mile away from the path up.
Light Tips
To get the best images, be at the trailhead before dawn and set out as soon as you can see, if not before (using headlamps). Once the sun hits the waterfalls the best light is gone. Reflected light is best. Strong reflected light is required for a great shot in the Subway itself.
Lens Selection
If I had to pick two general purpose lenses, the 16-35 and the 24-105 would be clear standouts. Those were the only two lenses I had with me for this 6.5 mile hike.
Reduce weight and hike happier!
Since there is overlap, I would prefer the second lens to be 35-135 or 35-150 instead of 24-105. Canon does not make my preferred choice.
Equipment
Those interested in my equipment and recommendations can find it here: Mish’s Equipment List.
Please Share!
If you like this article, please share by email or use one of the share buttons beneath the article.
Hiking and exploring opportunities in Zion National Park Utah are nearly endless. My favorite time of year is Autumn. I recommend staying in the park lodge, but don’t try to book at the last moment.
Before your trip, the first thing you should do is pick up Joe’s Guide to Zion National Park. It’s free. Joe describes all the major trails and offers recommended hikes.
My one caution is everyone wants an iconic image of the Watchman. An hour or more before sunset, people line up on a bridge that provides the viewpoint. You will stand shoulder to shoulder, assuming you can find a parking spot and photography spot. If the light isn’t perfect you will stand around for hours doing nothing.
I suggest doing something else. Anything else. Other parts of the park can be crowded, but the Watchman at sunset is the worst. In autumn, the trees from the Watchman view are in deep shadow at sunset.
I will display a Watchman image later, but I took it in the middle of the afternoon where there were interesting clouds and the sunlight was hitting the cottonwoods. There was no one else on the bridge, and the light was better than at sunset.
All the images on this page are High Dynamic Range (HDR), made by combining multiple images from the exact same position but different exposures. I try to use just two exposures if I can get away with it, one for the sky and one for the rest of the image. Lightroom has an HDR merge function or there are other programs you can use.
Here is another image from the same area.
There is not a soul in sight.
Equipment
Those interested in my equipment and recommendations can find it here: Mish’s Equipment List.
Please Share!
If you like this article, please share by email or use one of the share buttons beneath the article.